Our country pages
Africa
Europe
Search
Order a sample
You can order up to 3 free sample tiles.
We'll aim to deliver your sample order within 5-7 working days from your order date.
How to form a Radon Barrier

Until now the options for sealing the ground-floors and foundations of new buildings have been limited. Typically a single radon barrier membrane has been fitted across the entire footprint (including walls). Depending on the barrier membrane type, this can often mean an over-specification in some areas of the construction, while other areas such as walls, corners and penetrations end up with considerably less than required to effectively exclude radon, air and moisture.
Designers and builders can now solve these ground-floor sealing problems, in a cost-effective manner, by dividing the task into 3 simple steps, sealing walls, floors and service penetrations.
Sealing Walls and Designed Cavities
Seal all corners using Easi-Load™ Radon Corner Assembly kits. The standard kit includes 1 internal section, 1 external section and 1 corner cap section. Kits are also available to suit T-shaped junctions.
The internal and external sections should be trimmed if necessary to suit the height of the block or upstand.
Once these are in position, slide the corner cap down fully over the top of the block, ensuring both edges are lapped to the outside of the internal and external sections. Remove the release paper from the settlement sealant strips which are pre-applied to the inner walls of the corner cap. Apply firm pressure along the entire length of the sealant strips to ensure a complete seal has been achieved.
Remove all the release paper tabs from the settlement joints and angle fillets. Apply two strips of Monobond RT™ radon resisting tape across the entire assembly. Ensure each strip is placed across the angle fillets and settlement joint. Both strips should lap fully at the point where they meet (on the base of the internal corner section). Leave backing paper in place for the time being.
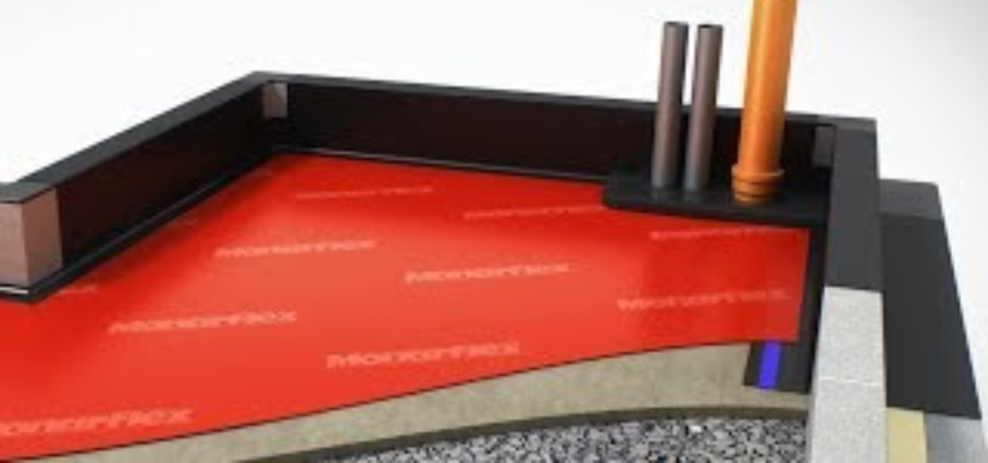
Easi-Load™ Radon DPC should be placed along the entire length of each wall. It should be dressed down to meet the sand-blinding/substrate and return horizontally a minimum of 100mm to facilitate lapping and sealing with the Monarflex radon barrier membrane. When used to seal external cavity walls, Easi-Load™ Radon DPC should cross the entire cavity and full width of the outer leaf.
All radon barrier DPCs should exit above external ground level. Where the length of radon DPC downstand in the cavity is deemed insufficient, an additional stepped DPC should be added.
To seal the Easi-Load™ Radon barrier DPC to the Easi-Load™ Radon Corner Assembly, remove the backing paper from the previously applied radon resisting sealant tape and carefully position the Easi-Load™ Radon barrier DPC, ensuring full coverage of each strip. Using a hand roller, apply firm pressure over both joints and ensure there are no gaps.
Sealing Floor Areas
Unroll one width of the Monarflex radon barrier membrane after determining the most effective method of covering the area. RMB350 is laid with the red side facing upwards. Reflex Super is laid with the sand-coloured side facing upwards.
Apply the appropriate 30mm double-sided sealant strip (Necobond™ when sealing Necoseal radon barrier membrane, or Monobond RT™ when sealing RAC, Reflex Super, RMB400 or RMB350). Leaving the backing paper on, lay the next width of membrane overlapping the first by 150mm.
Remove the backing paper from the sealant tape and join the top sheet to the bottom sheet by applying pressure with a hand roller. When the weather is cold keep the tape in a warm place until needed, and if necessary apply a little hot air but never use a naked flame.
It is preferable that radon barrier membranes are protected as soon as possible after installation to reduce the risk of damage that may be caused by following trades and/or during the concrete pour. The degree of risk will vary depending on the construction method being used and the level of supervision and technical control on site.
Jump to section
The RAM System
